
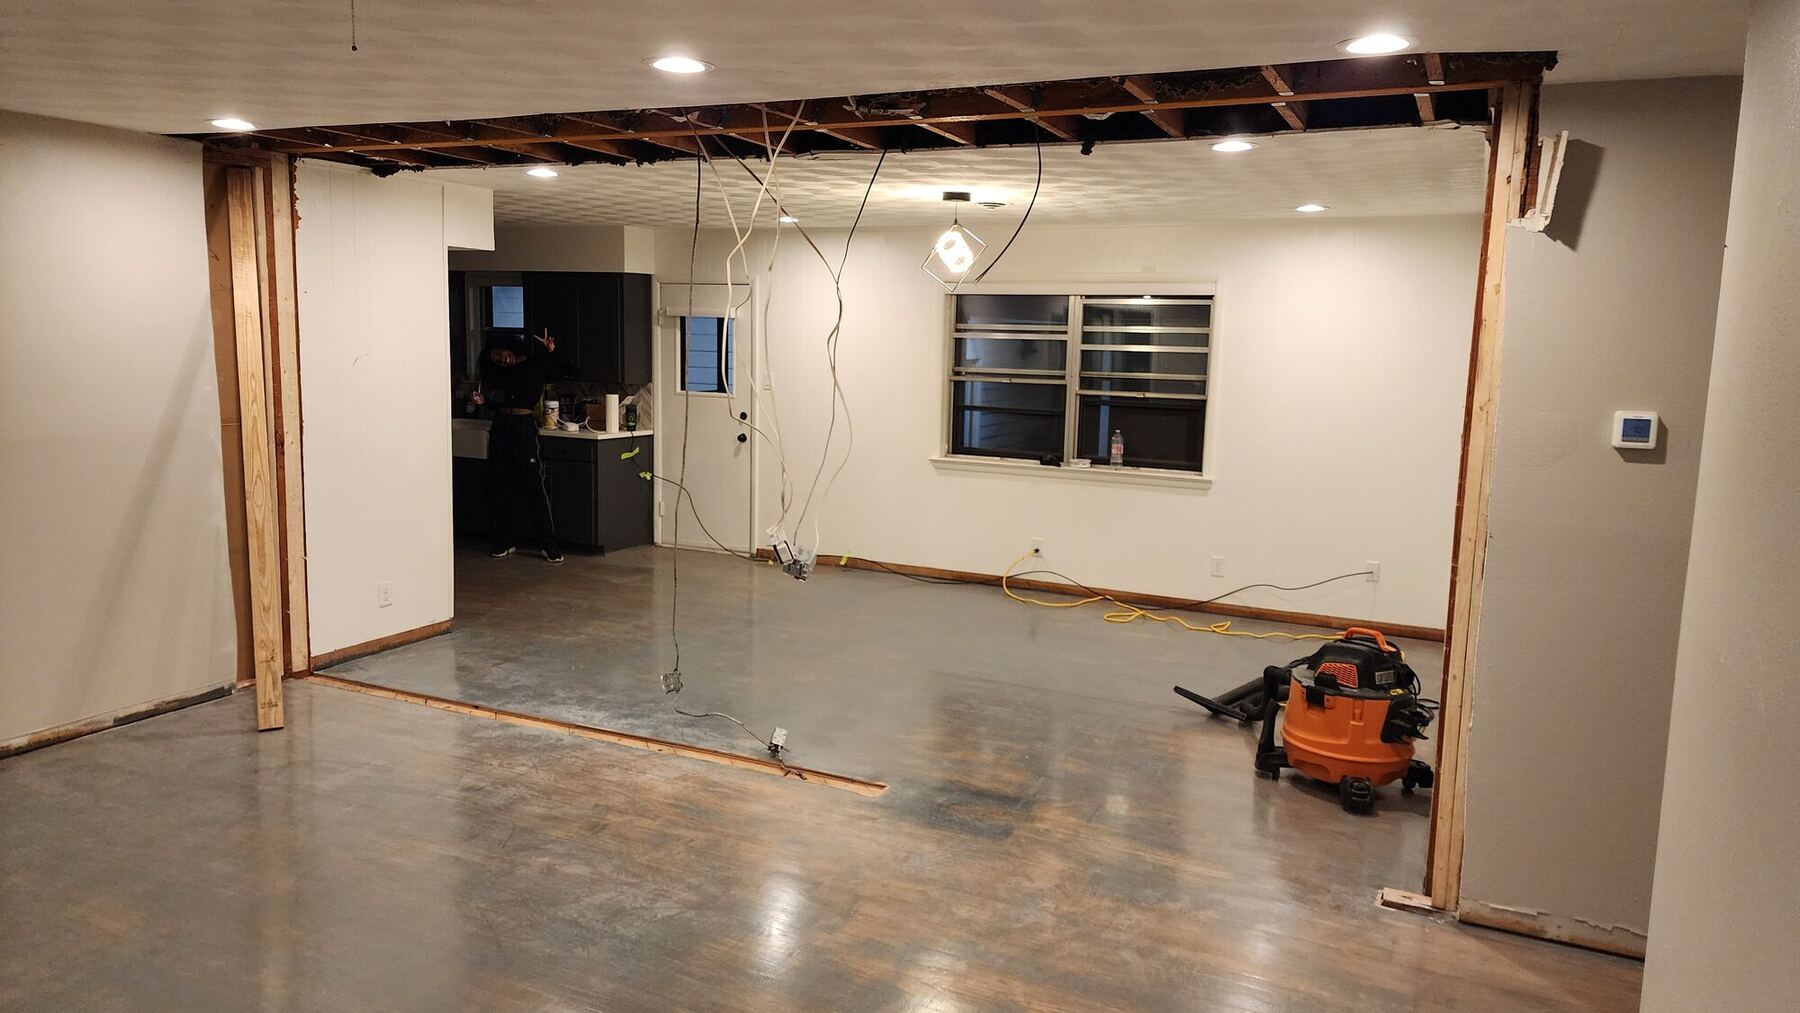
Opening a kitchen up to the living room is one of the most common projects we take on in Austin. It is also the one that makes homeowners the most nervous, and for good reason. A load bearing wall is holding up part of your house. Take it out the wrong way and you get sagging ceilings, cracked drywall and doors upstairs that stop closing. Take it out the right way and nobody will ever know a wall was there.
Here is what a properly done load bearing wall removal looks like from start to finish, with photos from our own jobs.
Step 1: Confirm the wall is actually load bearing
Not every wall is. A few clues that a wall is carrying weight:
- It runs perpendicular to the ceiling or floor joists above it.
- It sits near the middle of the house.
- Another wall, a beam or a post lines up directly above or below it.
- Joists from both sides overlap or splice on top of it.
Clues are not answers, though. We check the attic or open a small inspection hole to see what the wall is really doing. When the load path is not obvious, our sister firm Elora Structural looks at it before anything gets cut.
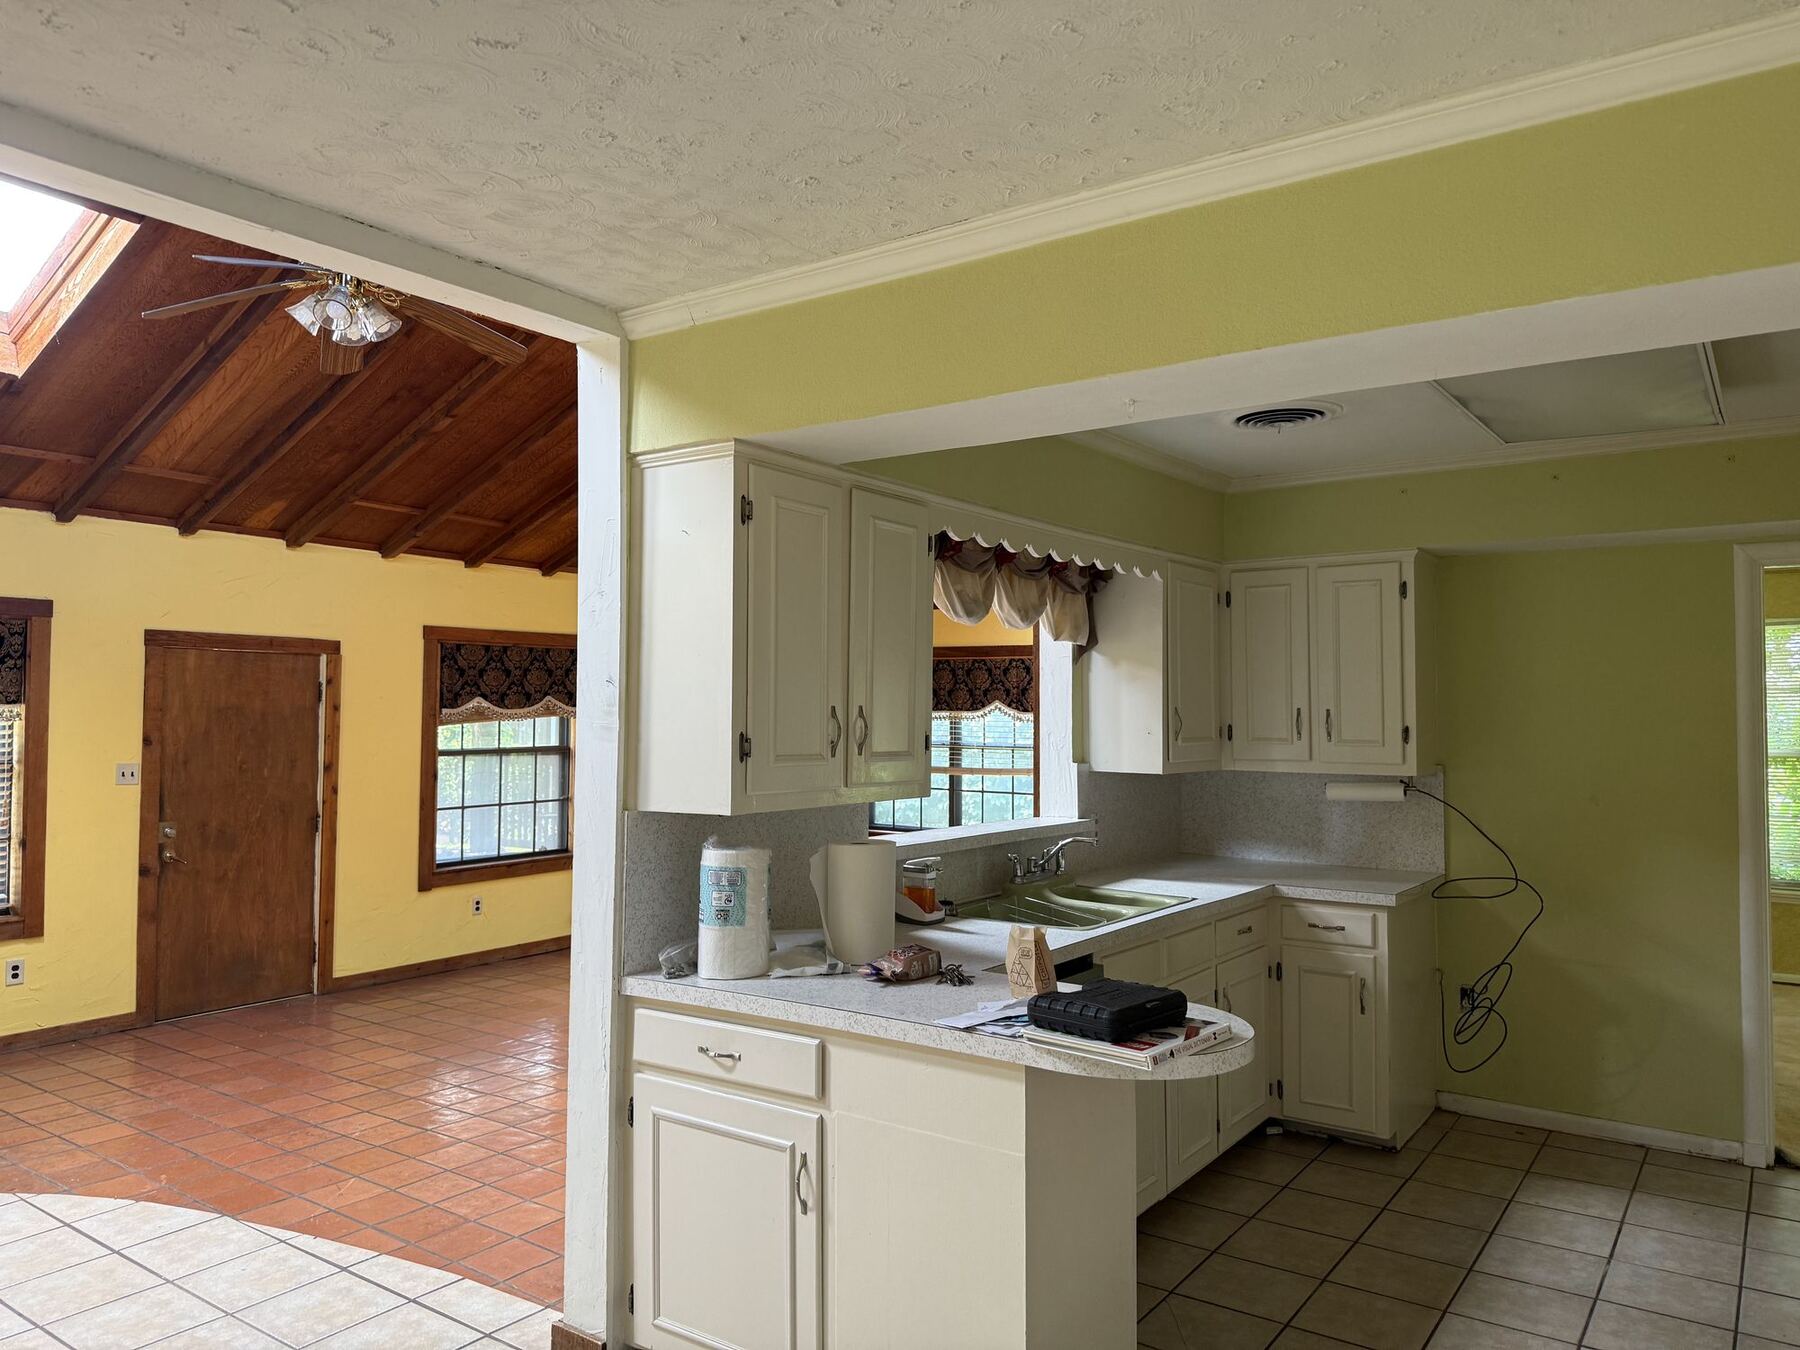
Step 2: Engineer the beam, posts and footings
Taking out the wall does not take away the load. It moves it. Everything the wall was carrying has to go into a new beam, down through a post at each end, and into the foundation. Elora Structural sizes all three based on the span, what sits above the wall (just a roof, or a second floor) and the foundation under it.
That engineering is also what the city wants to see. In Austin, removing a load bearing wall almost always needs a building permit, and the plans have to show how the load gets carried. Depending on the job, the answer is usually one of these:
- An LVL beam, which handles most residential spans.
- A steel beam for long spans, heavy loads or tight depth limits.
- A new concrete footing under each post when the existing foundation cannot take a point load there.
Step 3: Choose a flush beam or a dropped beam
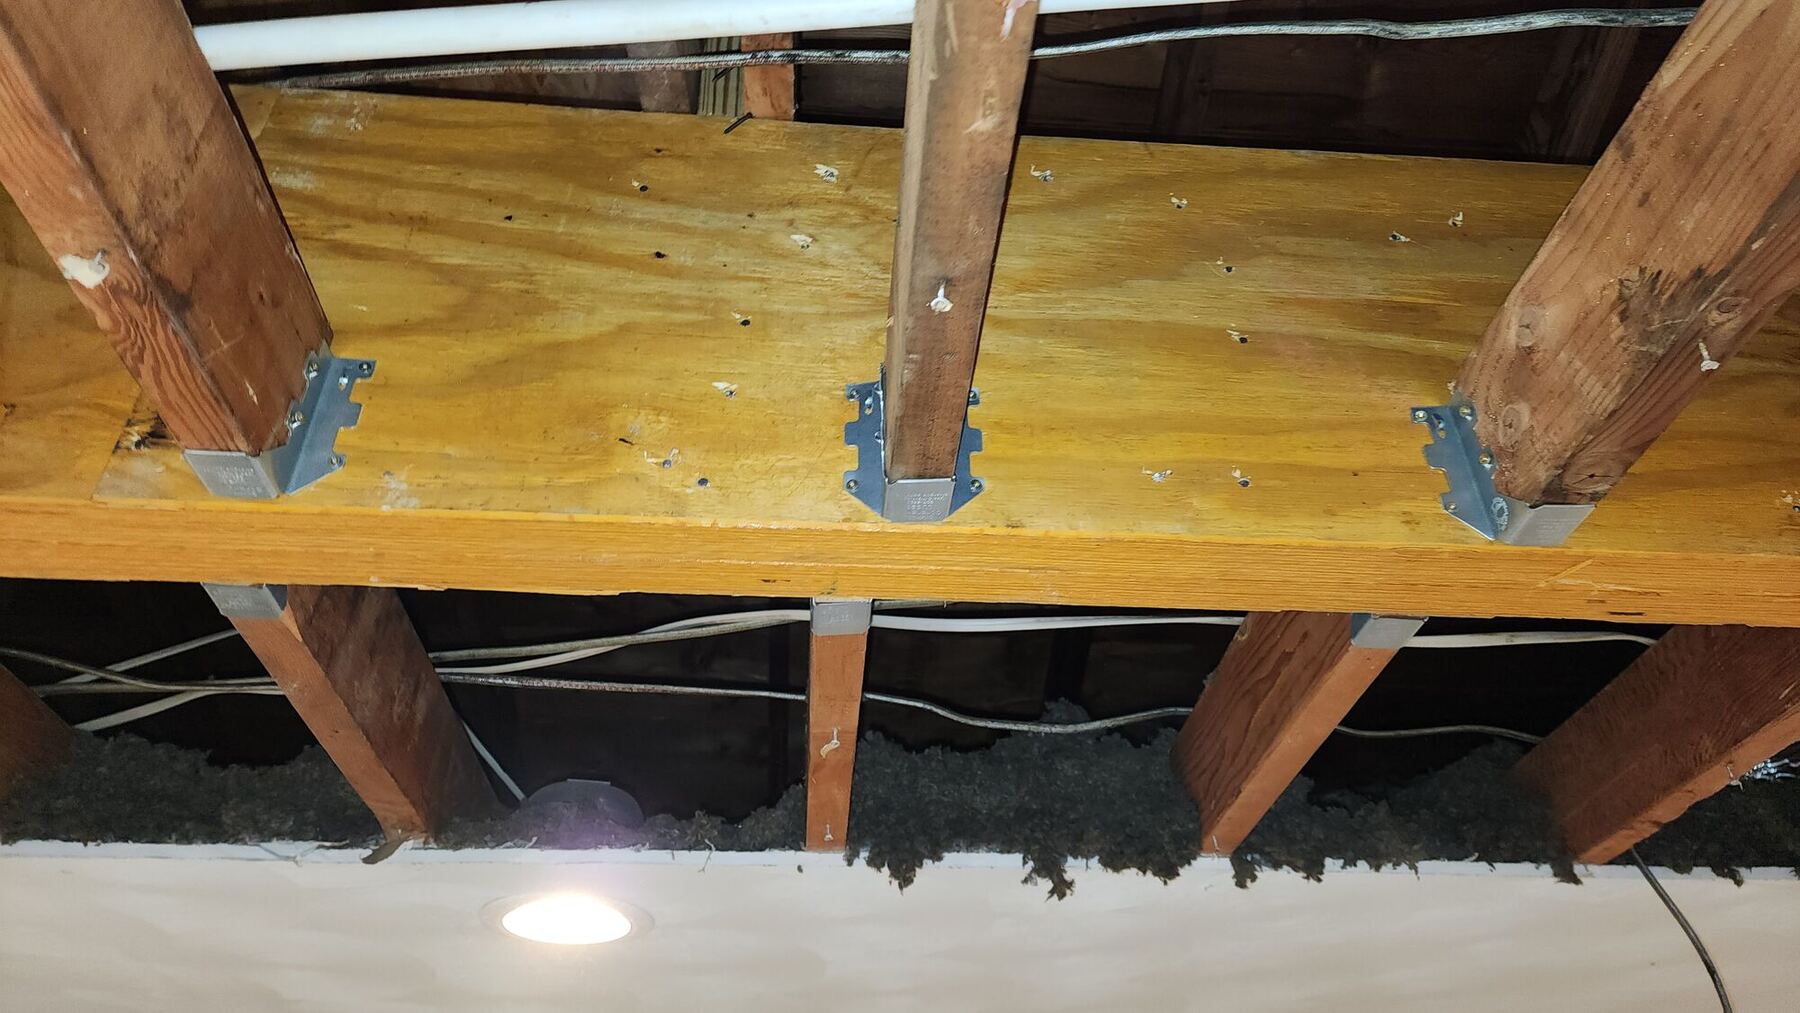
A flush beam sits up inside the ceiling, in line with the joists. The joists hang off the side of it on metal hangers, so once the drywall goes back up the ceiling is flat and the beam disappears. A dropped beam hangs below the ceiling instead. It is less work, and sometimes it is the only option when the span, the load or what is above the ceiling does not allow a flush beam.
Most homeowners want the flush beam. We will tell you up front whether it is possible on your house.
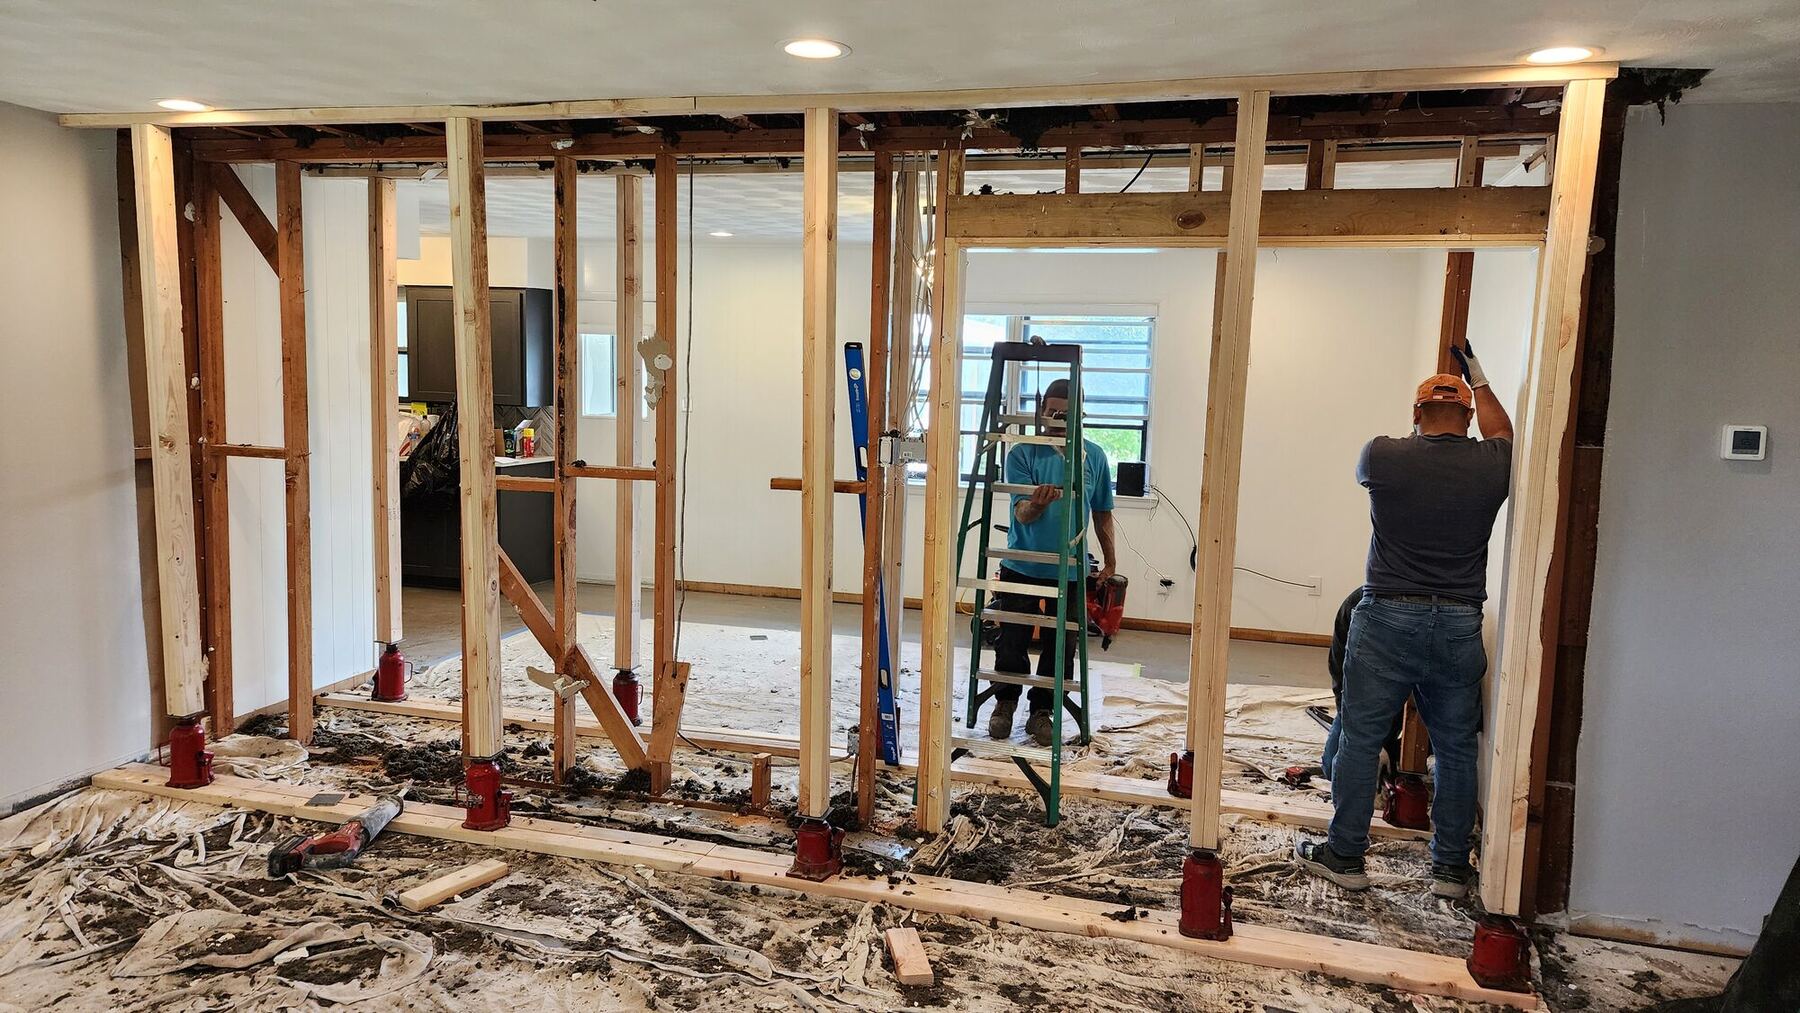
Step 4: Shore up the house before the wall comes out
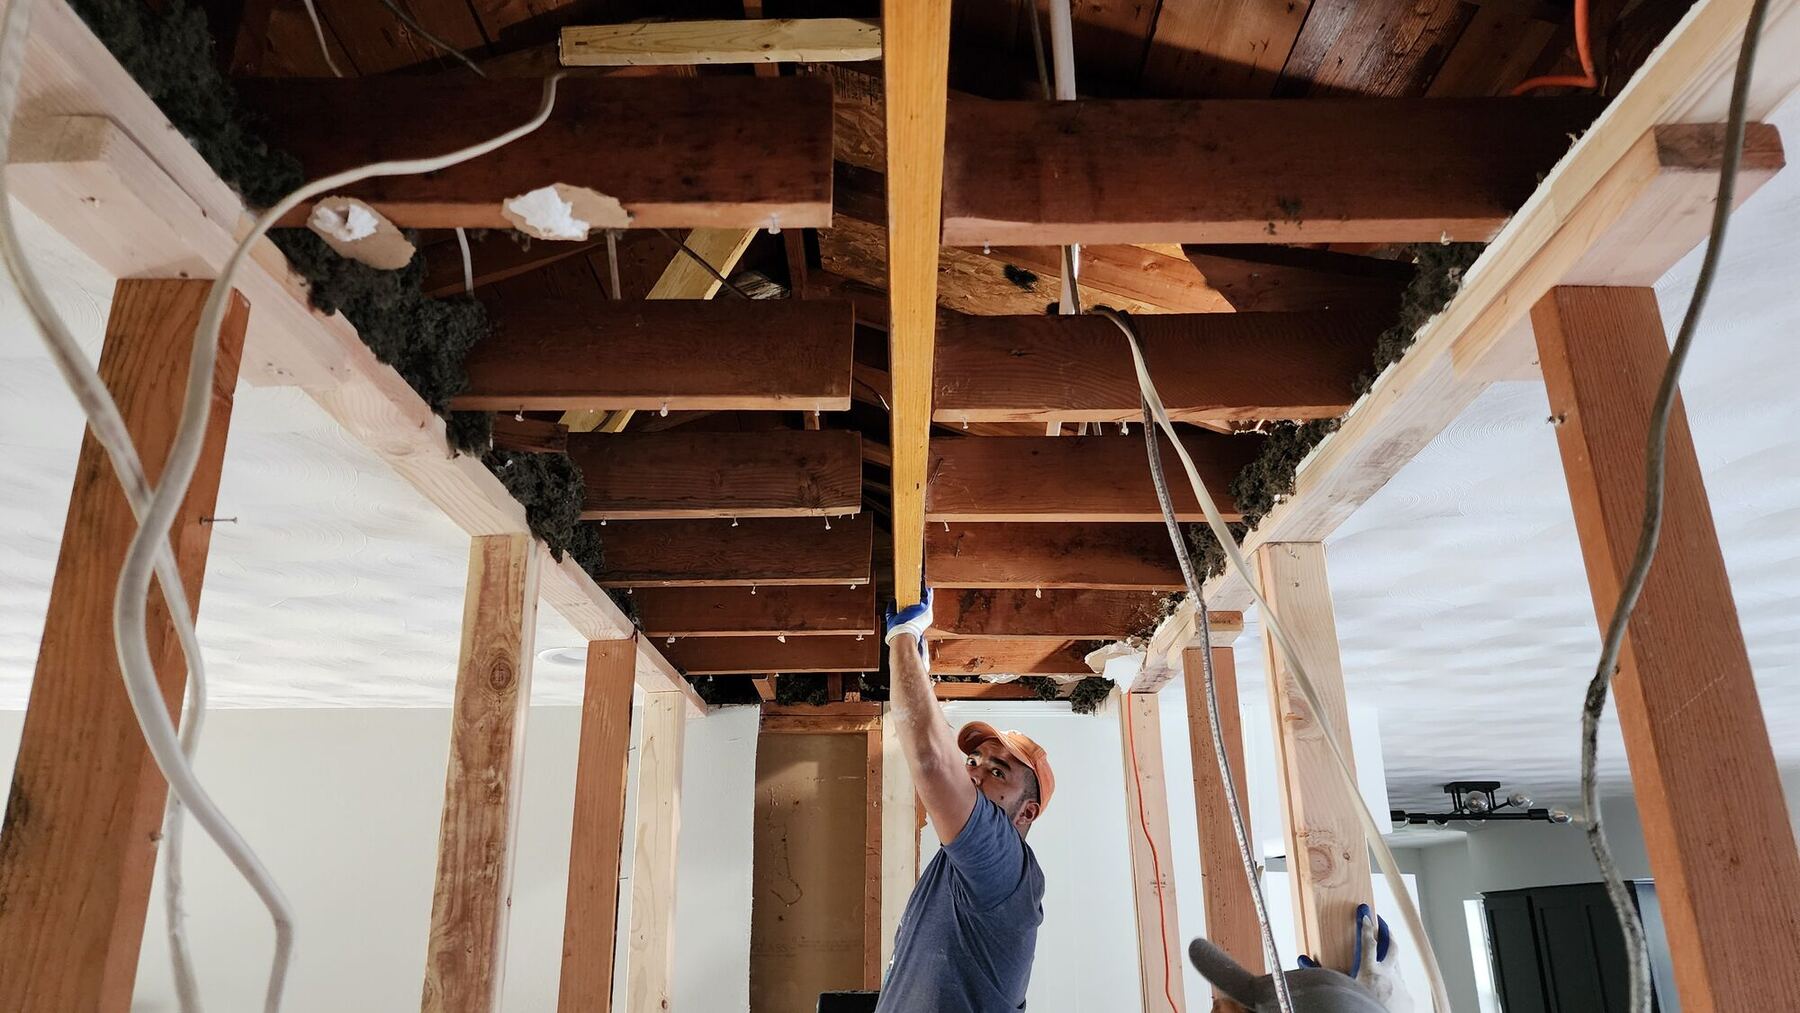
Before we remove a single stud, we build temporary shoring walls on one or both sides of the wall. They hold up the ceiling and anything above it while the old wall comes out and the new beam goes in. They stay in place until the beam and posts are carrying the load on their own.
Step 5: Remove the wall and set the beam
With the house shored, we take the wall down. Any plumbing, wiring or ductwork running through it gets rerouted first. For a flush beam, we open the ceiling, lift the beam into the pocket, set the posts at each end and hang every joist off the beam. Then the framing gets inspected before anything is closed up.
Step 6: Inspect, close it up and patch
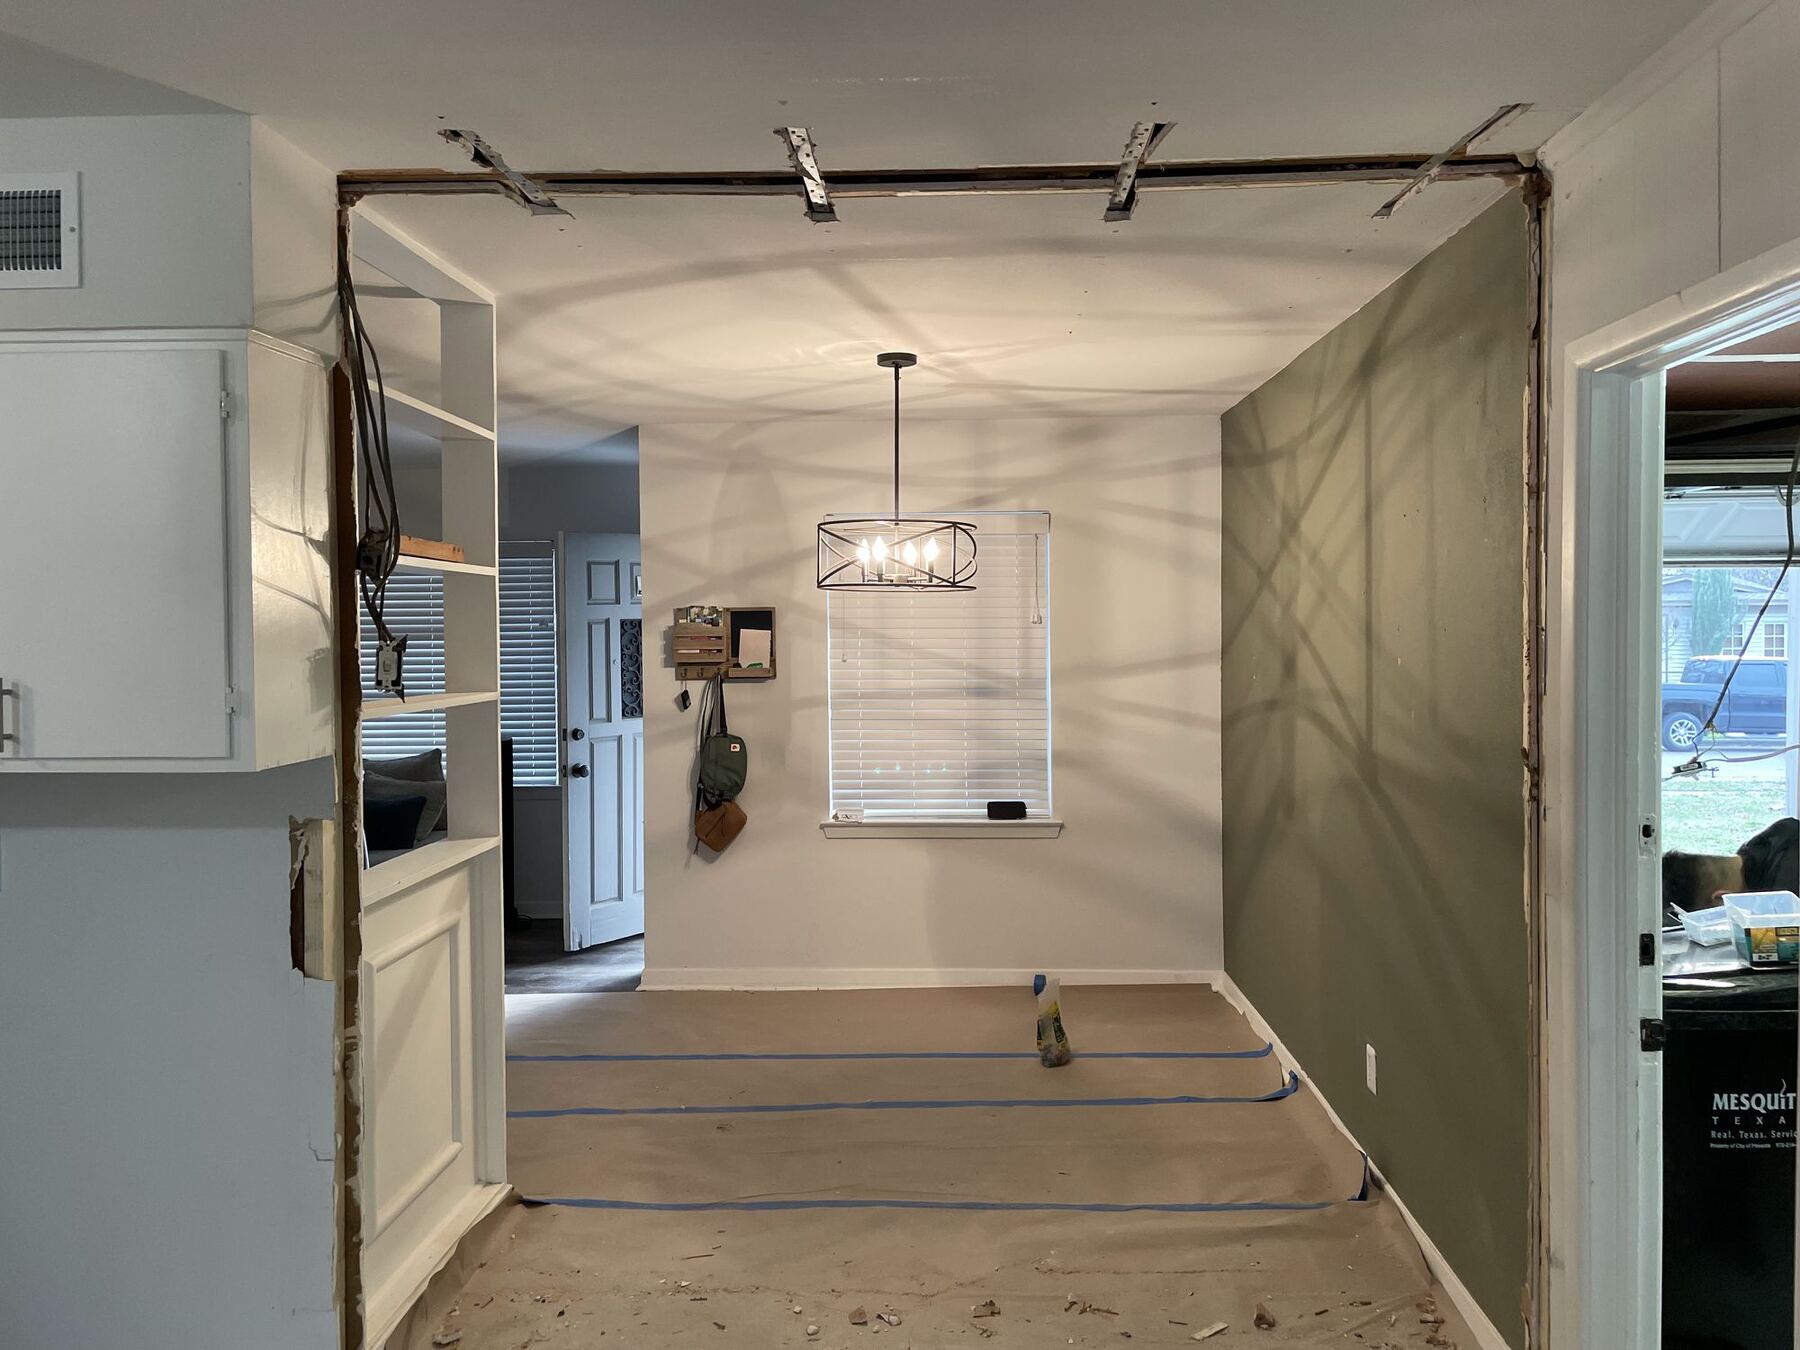
Once the framing inspection passes, the shoring comes out and the finish work starts: drywall on the beam and ceiling, texture to match, and a flooring patch where the bottom of the old wall used to be.
How long does it take?
Most residential wall removals take three to seven working days on site, once the plans and permit are approved. The engineering and permitting come first, so plan for that time before work starts.
What drives the cost?
Every wall is different, so we do not quote off a photo. The things that move the price most are:
- How long the span is.
- What the wall is carrying: roof only or a second floor.
- Wood or steel, and flush or dropped.
- Whether new footings are needed under the posts.
- What is inside the wall: plumbing, electrical or HVAC that has to move.
- How much finish work you want us to handle.
After a site visit, we give you a written price for your specific wall.
Thinking about taking out a wall?
Call us at (214) 631-9477 or request a free estimate. Chris will walk the job with you, tell you whether the wall is load bearing and explain what it will take to open it up the right way. See more on our wall removal service.